Track Maps
  • Autobahn
  • Blackhawk Farms
  • GingerMan
  • Road America
Documents
  • Autobahn Handbook
  • Blackhawk Handbook
  • Novice Day at Blackhawk
  • How to Drive Blackhawk
  • Run Groups
  • Passing Rules
  • Permanent Car Numbers
  • Drivers Ed Tech Sheet
  • Road Course Techniques
PCA Chicago Region

PCA Chicago Region

© 2026 PCA Chicago Region. All Rights Reserved.

  • Sponsorship
  • Registering for Events
  • Privacy Policy

If you have never digitally signed a PDF, these steps will help you through the process.

It is important that you have selected all of the candidates you wish to vote for as well as entered your name, email address, and member number BEFORE you sign the ballot because the fields for associated with the signature will become read-only and will not be able to be changed once the document has been signed.

Open the ballot in the Adobe Reader application.  You cannot sign a PDF document from within a browser.

Once you have completed your ballot, click the signature portion of the ballot below where you selected your desired candidates as shown in highlighted selection of the ballot below:

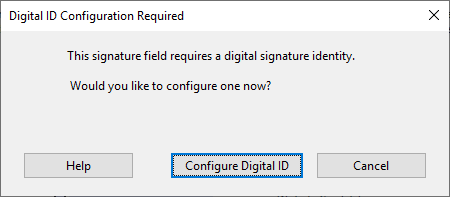
If you have not configured a digital signature, a prompt similar to what is shown below will be displayed.  Click the Configure Digital ID option.
This will bring up a series of dialogs that will guide you through the creation of a digital id on your computer.  Depending on the version of the Adobe Reader you have installed, the dialogs may be slightly different but the information they will request, and the end result will be the same.


Select Create a new Digital ID and click Continue
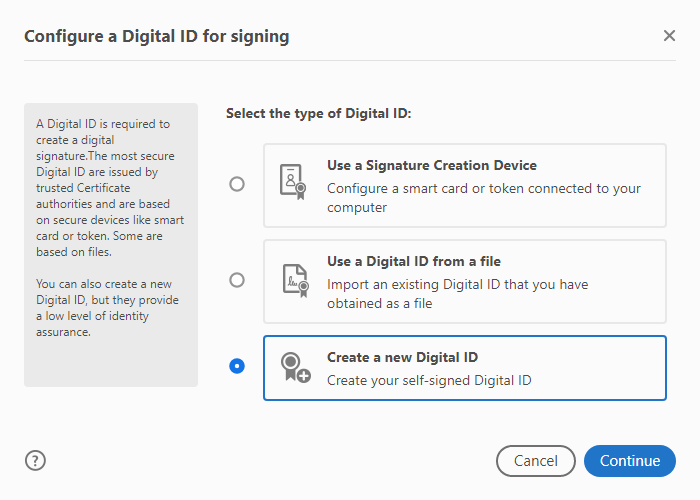

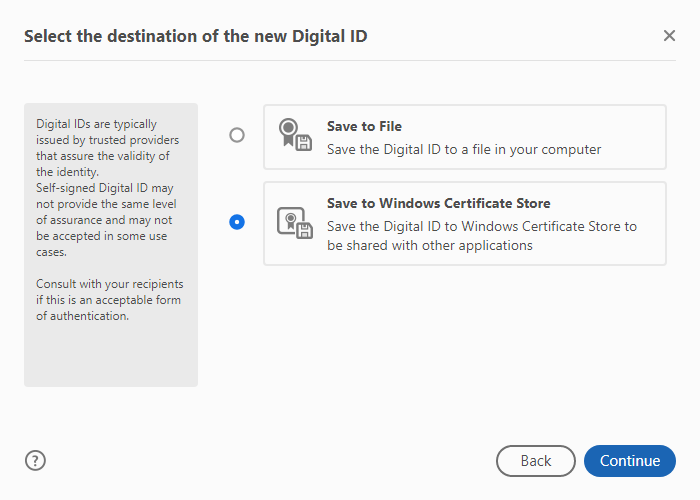
Select Save to Windows Certificate Store and click Continue

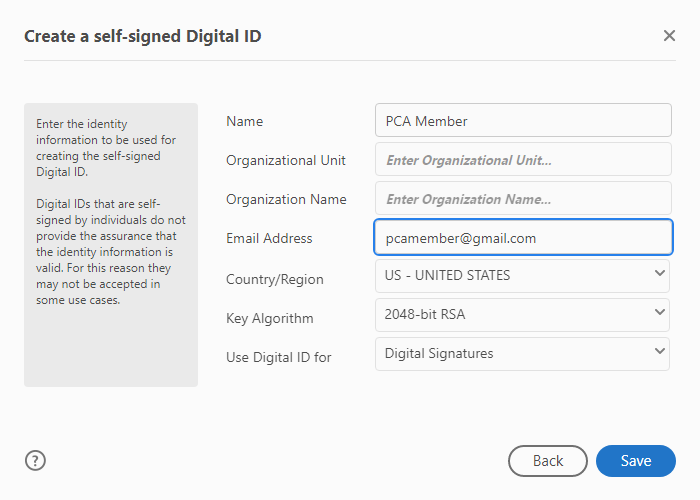
Enter your name and the email address you provided the PCA National website (PCA.org) and click Save

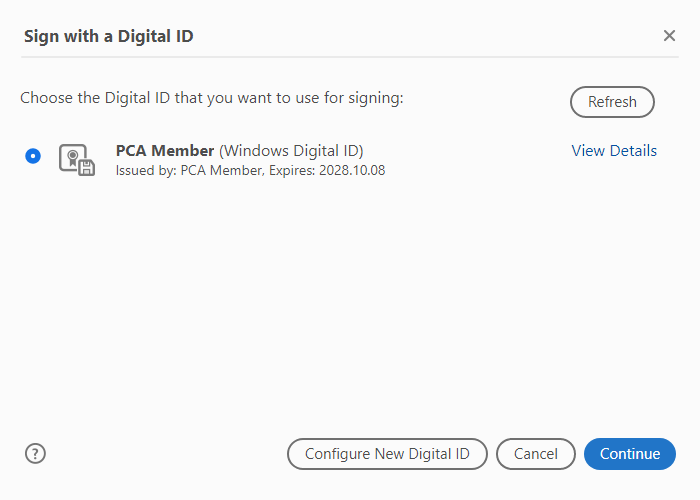
Select the Digital ID you want to use to sign the document and click Continue

Click Sign
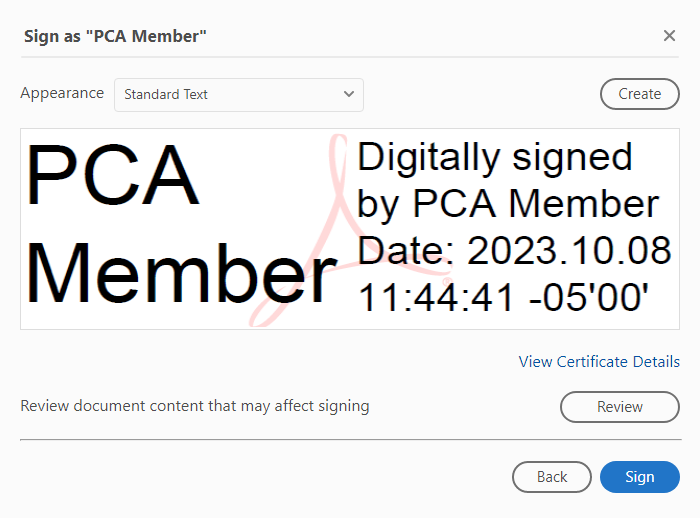

You will now be prompted to save the signed PDF to your computer.
This is the file you will then email to be counted.
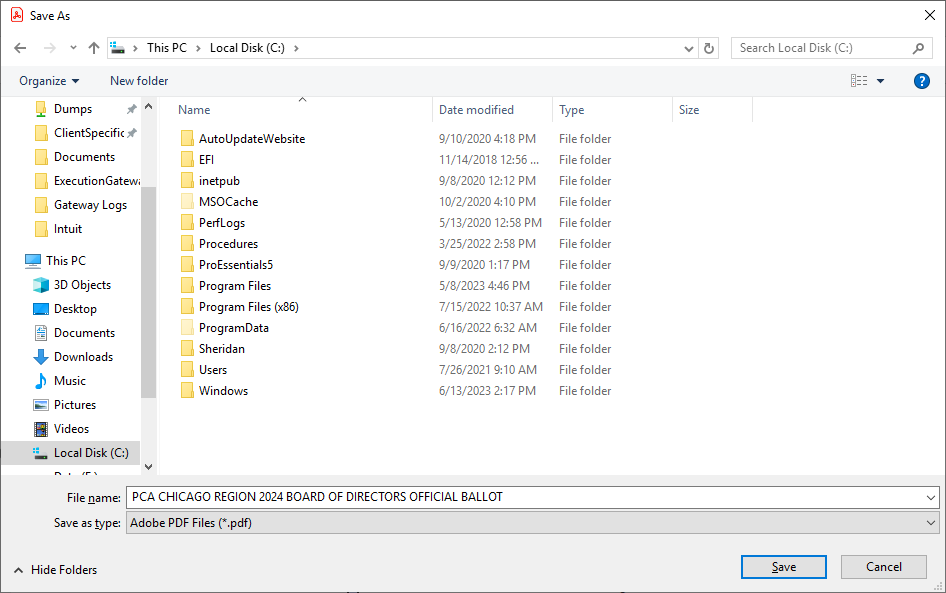

If you need to configure a second signature on your computer for another member in your household, you can repeat this process.

If you do have two memberships in your household, and you use the same ballot, remember to save the ballot after signing the second time.  It is OK to overwrite the ballot you saved when you signed it the first time.

Finally, don’t forget where you saved the ballot, as that is the file you will need to submit.

If you use Outlook, you can add the shared calendar by following these steps:

  • Select Calendar
  • Select either the From Internet… option from the Open Calendar drop-down on the Outlook ribbon or right click on My Calendars and select From Internet…
  • In the Location field, enter the following”
    https://calendar.google.com/calendar/ical/eventschedule%40pca-chicago.org/public/basic.ics
  • click OK

If you want to have our calendar overlay your default calendar in Outlook once you have followed the steps above:

  1. In Calendar, in the Navigation Pane, select the check box of another calendar that you want to view.
    The calendar that you selected will open to the right of the calendar that is already displayed. Each successive calendar opens to the right of the one most recently opened.
  2. On the calendar’s tab, click View in Overlay Mode (the left-facing arrow on the calendar tab.) That calendar is now in overlay mode with the one you opened first — usually your default calendar.

If you use the native Calendar application on your iPhone and you want our events to be automatically added to your calendar, follow these steps on your iPhone:

  • Open Settings > Calendar
  • Tap Accounts
  • Tap Add Account
  • From the list of account types, tap Other
  • Tap Add Subscribed Calendar
  • In the Server field, enter the following:
    https://calendar.google.com/calendar/ical/eventschedule%40pca-chicago.org/public/basic.ics and tap Next
  • Tap Save

Now, when you open the iPhone Calendar application, our events will be automatically merged in.


These steps are for IOS 14 and later and could be slightly different for other versions.

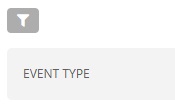
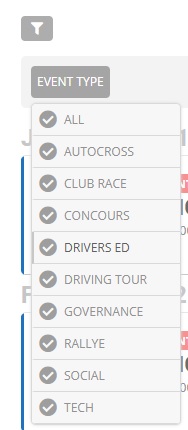
1) Click on the filter Icon

2) Click on the Event Type Box

3) Select an Event Type From the List

X